Kansas City, known for its vibrant culture, rich history, and bustling neighborhoods, is a place many homeowners are proud to call home. With stunning architectural designs and varying styles of houses, it’s no wonder that maintaining curb appeal is essential for residents in this charming city. One key aspect that often gets overlooked is the garage, which can significantly impact your property’s overall appearance and value. Additionally, a well-functioning garage door is crucial for the safety and security of your home. That’s why Kansas City homeowners must consider revamping their garage with door drum replacement.
Door drums play a vital role in your garage door’s smooth and reliable operation. Over time, these components can wear out, causing your door to become noisy, shaky, and potentially unsafe. In this comprehensive guide, we’ll explore the benefits of door drum replacement for Kansas City homeowners and walk you through the process of transforming your garage into a safe, functional, and visually appealing space.
What are Garage Door Drums?

Garage door drums come in various sizes, which are determined by the height of the garage door and the required high lift. The dimensions of the lift cable also influence the drum size. Typically, residential garage door drums feature a standard hub, while commercial garage doors possess a keyed hub.
To comprehend the workings of garage door drums, understanding the spring system’s function is essential. This system serves as a counterbalance for the door, while the cables and drums supply the lifting power. Cables are attached to the bottom corners of the garage door and extend upward along the door’s height, eventually winding around the drum connected to the spring bar.
As the garage door opens, the cables wrap around the drum. Conversely, when the door closes, the cables unwind from the drum. If there are issues with the cables or drum, the garage door may struggle to open or close seamlessly.
What is Door Drum Replacement, and Why Do You Need It?
Door drum replacement refers to replacing the drums on a garage door system. Garage door drums are essential components that work in conjunction with the door’s spring system and cables, providing the necessary lifting power for the smooth opening and closing of the door.
There are several reasons why you might need door drum replacement, including:
- Wear and tear
Over time, garage door drums may become worn, damaged, or corroded, leading to decreased performance and potential failure of the garage door system.
- Malfunctioning drums
If the drums are not functioning correctly, the garage door might not open or close smoothly, causing inconvenience and potential security risks.
- Uneven door movement
Damaged or worn drums can cause the garage door to move unevenly, increasing strain on other components, such as cables and springs. Replacing the drums can help restore balanced movement and prolong the entire system’s life.
- Noise reduction
Worn or damaged drums may generate excessive noise during operation. Replacing them can reduce noise levels and improve the overall performance of the garage door system.
- Safety concerns
Malfunctioning drums can pose a safety risk, as they may cause the garage door to suddenly fall or fail to close correctly, potentially harming people or damaging property.
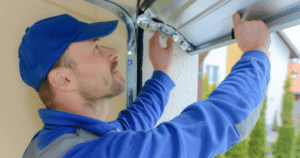
A professional garage door technician should carry out door drum replacement to ensure proper installation and alignment. Regular maintenance and inspection of your garage door system can help identify any issues with the drums and other components, allowing you to address them before they escalate into more significant problems.
How to Choose the Right Door Drum for Your Garage?
Choosing the right door drum for your garage is crucial for your garage door system’s smooth functioning and longevity. Here are some factors to consider when selecting the appropriate door drum:
Garage door type: Consider the type of garage door you have—residential or commercial—as they require different door drums. Residential garage door drums typically have a standard hub, while commercial garage door drums have a keyed hub.
Garage door height: The height of your garage door is a determining factor in choosing the right drum size. Different door heights require specific drum sizes to ensure proper cable winding and unwinding.
High lift requirement: The amount of high lift your garage door needs is another factor that influences drum size. High lift doors have an increased vertical rise, necessitating larger drums to accommodate the additional cable winding.
Lift cable size: The diameter of the lift cables used in your garage door system can also affect the drum size. Ensure that the chosen drum is compatible with the lift cable diameter to prevent malfunctioning.
Spring system: Check the type and size of the spring system in your garage door (torsion or extension springs). The drum needs to be compatible with the spring system for efficient operation.
Weight capacity: Ensure the drum you choose has the appropriate capacity to handle your garage door’s weight. Using a drum with insufficient weight capacity can lead to premature wear and potential failure.
Manufacturer’s recommendations: Consult your garage door’s manufacturer for specific drum recommendations. This information is often available in the owner’s manual or on the manufacturer’s website.
Professional advice: If you need clarification on the right door drum for your garage, consult a professional garage door technician. They can assess your door system and recommend the appropriate drum based on their expertise and experience.
By considering these factors and seeking professional advice, you can select the right door drum for your garage, ensuring smooth operation and prolonging the life of your garage door system.
Preparing for Door Drum Replacement:
Before you begin replacing your garage door drum, it is essential to be prepared and have all the necessary tools and materials. Follow these steps to ensure a smooth and safe replacement process:
- Gather necessary tools and materials: Before starting the project, ensure you have ready all the required tools and materials. These include:
- Replacement door drums
- Wrench set
- Locking pliers
- Pry bar
- Screwdriver
- Work gloves
- Safety goggles
- Clear the workspace: Remove any items or obstacles from the area around the garage door, ensuring you have enough space to work comfortably. This will minimize the risk of accidents or damage to your belongings during the replacement process.
- Secure ample lighting: Adequate lighting is crucial when working on this project. Ensure the garage is well-lit, allowing you to see clearly throughout the process. Bring additional lighting, such as portable work lights or a flashlight, if necessary.
- Familiarize yourself with the process: Review the door drum replacement steps and understand the process before starting. This will help ensure you know what to expect and avoid potential complications.
- Engage a helper if needed: Replacing garage door drums can be challenging, especially if you’re inexperienced. Consider asking a friend or family member to assist you, or if you feel you need more clarification about your ability to complete the project safely, hire a professional installer.
- Ensure proper safety measures: Your safety should be the top priority. Always wear work gloves and safety goggles to protect your hands and eyes from hazards. Also, be aware of the high tension in the torsion springs and door drums, and proceed cautiously throughout the replacement process.
By preparing for door drum replacement, you will be better equipped to tackle the project safely and efficiently, revamping your garage for improved functionality and aesthetics.
What is the Step by Step Guide for Door Drum Replacement
Step-by-Step Guide to Door Drum Replacement:
Replacing garage door drums is crucial for maintaining the smooth and safe operation of your garage door. Follow these step-by-step instructions to replace your door drums:
Step 1: Disconnect the garage door opener Unplug the garage door opener from the power source, and engage the manual release mechanism. This will allow you to operate the door manually and ensure your safety during the process.
Step 2: Secure the garage door in the open position Carefully open it until it’s fully open. Use locking pliers or a clamp on the door track below the bottom rollers to keep the door securely in place. This will prevent the door from accidentally closing while you work on the drum replacement.
Step 3: Loosen the set screws on the cable drum Locate the cable drum at either end of the torsion spring system. Use a wrench to carefully loosen the set screws on the drum, releasing the tension on the cables.
Step 4: Unwind the cable from the drum With the set screws loosened, carefully unwind the cable from the drum. Be cautious; the cables are under tension and can snap back if not handled properly.
Step 5: Remove the old drum from the shaft Once the cable is fully unwound, use a pry bar to remove the old drum from the shaft carefully. Be gentle to avoid damaging the shaft or nearby components.
Step 6: Install the new drum Position the new drum onto the shaft, ensuring it is properly aligned and seated. Make sure it corresponds with your garage door system (standard-lift, vertical-lift, or high-lift).
Step 7: Wind the cable back onto the new drum Carefully rewind the cable onto the new drum, ensuring it’s evenly spaced and properly aligned. This will ensure that the door opens and closes smoothly.
Step 8: Tighten the set screws Once the cable is securely in place, tighten the set screws on the new drum using a wrench. This will secure the drum and cable, ensuring proper tension for smooth operation.
Step 9: Remove the locking pliers or clamp and lower the door Carefully remove the locking pliers or clamp from the door track and slowly lower the door. Make sure it operates smoothly and is properly aligned.
Step 10: Reconnect the garage door opener Plug the garage door opener back into the power source and disengage the manual release mechanism. Test the door to ensure it opens and closes smoothly with the opener.
By following these steps, you can successfully replace your garage door drums, improving the functionality and safety of your garage door system. Always exercise caution when working with high-tension components, and consider seeking professional assistance if you need clarification on any aspect of the process.
Need To Revamp Your Garage with Door Drum Replacement?
Garage door drums can become faulty due to rust and dirt accumulation, causing the door to become unstable and noisy. It’s crucial to recognize the significance of a garage door, as it ensures the smooth operation of the entire system in conjunction with the springs.
As we have noted, replacing the drums and cables can be complex and hazardous. Moreover, selecting the appropriate option can be challenging without technical expertise.
As previously mentioned, the required cable drum type depends on factors such as the door’s height and weight and the cable’s length and thickness. In this case, your best option is to hire expert technicians from Team Taylor Door.
When it comes to garage door drum replacement, you can trust that we’ll supply the right type for your needs. Furthermore, we exclusively offer top-quality brands for garage door components. Additionally, by hiring us, you can take advantage of exclusive deals and discounts on our services and products.
At Team Taylor Doors, our passion for top-quality garage door repair and installation services is evident in our work. Serving the Kansas City area, our expert team ensures your home is in good hands.
We recognize the inconvenience of a malfunctioning garage door and provide 24/7 emergency repair services for prompt assistance. Committed to long-lasting solutions, our experienced professionals offer new installations, garage door repair Kansas City, and maintenance advice to keep your garage door operating smoothly.